User guide
GULIO (Get Ur Life In Order) is a desktop app that provides a single consolidated and personalised workspace for NUS SoC students to organize their modules. GULIO is optimized for use via a Command Line Interface (CLI) which SoC students will be familiar with typing in, instead of a Graphical User Interface (GUI).
If you are having difficulties managing your schedule, lesson links and notes, GULIO is the app for you. With the ability to store lesson details, tasks, notes and more, GULIO is a one-stop solution for all your university scheduling needs.
This guide is written for users like you, for reference when there is a particular feature that you are unsure of how to use. It provides all the necessary information required for you to fully utilize GULIO’s capabilities.
Table of Contents
- How to Use This Guide
- Quick Start
- Features
- Overview
- Dashboard Commands
- Module Commands
- Listing all module commands :
help - Closing a module :
close - Showing module information :
info - Adding a lesson :
add lsn - Deleting a lesson :
del lsn - Editing a lesson :
edit lsn - Opening lesson link :
link - Listing all teaching staff :
tch - Listing all lessons :
lsn - Adding a task :
add task - Deleting a task :
del task - Editing a task :
edit task - Marking task as done :
mark - Marking task as undone :
unmark - Listing all tasks :
task - Adding a cheat-sheet :
add cs - Deleting a cheat-sheet :
del cs - Editing a cheat-sheet :
edit cs - Listing all cheat-sheets :
cs
- Listing all module commands :
- Data & Storage
- Text Editor
- FAQ
- Command Summary
How to Use This Guide
Icons used in this guide:
💡 - indicates a tip that may be useful to you.
⚠ - indicates a warning that you should take note of.
Commands will be presented in the following format:
Command function : keyword
Summary of actions involved.
Format:
command formatExample: (if any)
Step number
What you will get.Result - Outcome of command (if any)
Quick Start
Download the latest version of GULIO from here.
Requirements:
Java 11 and above
💡 Verify this by running the command “java –version” in command prompt (for Windows users) or Terminal (for Mac and Linux users).
Steps:
- Move the
GULIO.jarfile to your preferred directory. - Open command prompt (for Windows users) or Terminal (for Mac and Linux users),
- Navigate to the directory of your GULIO.jar file.
- Run the command “java -jar gulio.jar” to start GULIO.
💡 The file name is not case-sensitive, so both
gulio.jarandGULIO.jarworks.
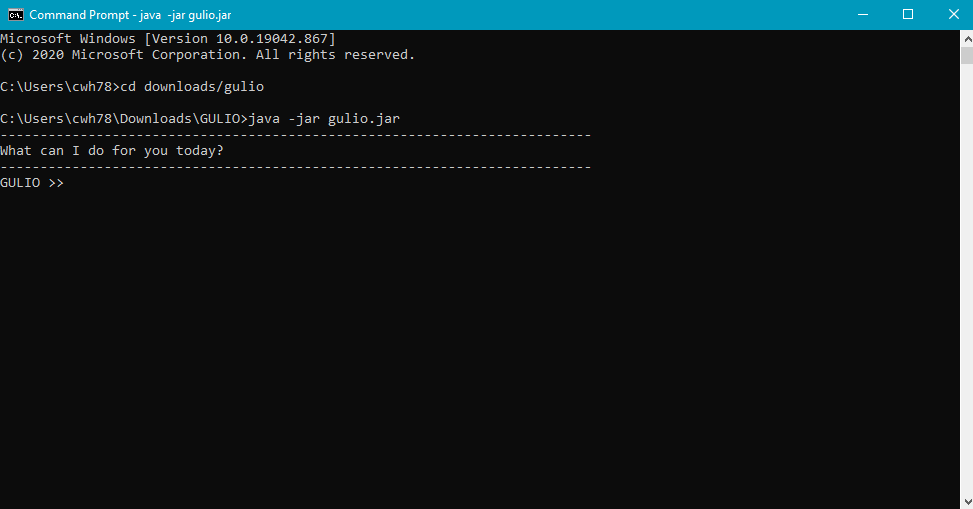
Figure 1 - Example of Opening GULIO in Command Prompt
Features
Overview
GULIO has a 2-layer system, consisting of the dashboard layer, and the module layer. In both layers, you have access to a different set of commands.
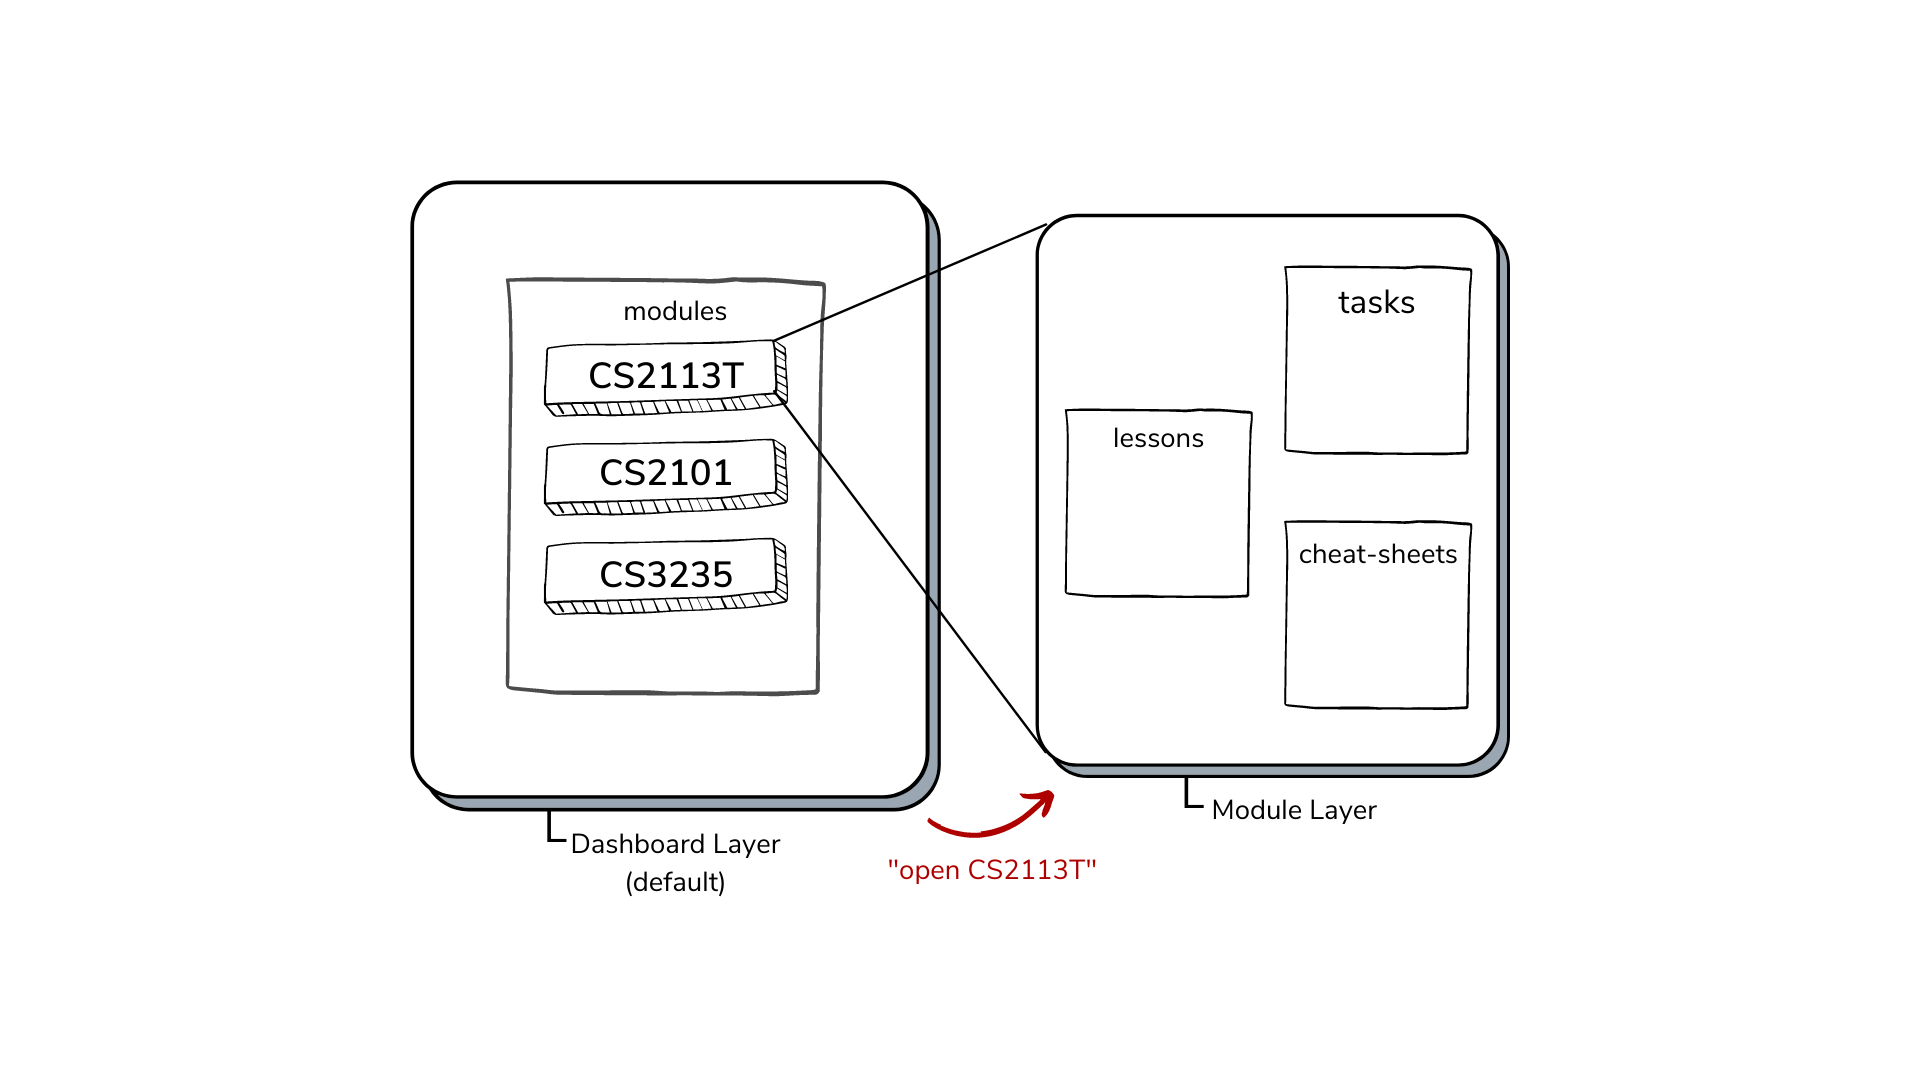
Figure 2 - Visualisation of GULIO’s 2-layer system
On start up, you will be on the dashboard layer where you have an overview of all your modules. You have access to module management commands like adding, deleting or opening a particular module.
💡 Please refer to the section Dashboard Commands for information regarding commands at the dashboard layer.
Opening a module puts you on the module layer where you can interact with data within the module.
💡 Please refer to the section Module Commands for information regarding commands at the module layer.
To identify which layer you are on, simply check the tag beside your input.
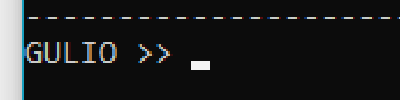
- “GULIO” indicates that you are at the dashboard layer.
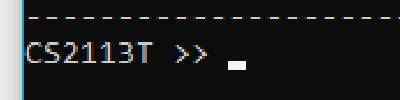
- A module code (e.g. “CS2113T”) indicates that you are within that module.
|
|
|
Each module can store two types of data: lesson and task. Lessons refer to your lectures, labs and tutorials, which are all recurring events. Meanwhile, tasks are used to store one-time events, like your homework, quizzes and any other activities with a deadline.
Fields in a lesson:
| Field | Description |
|---|---|
| Lesson type | Lecture, lab or tutorial. |
| Day & time | Information on when the lesson happens. |
| Link | Online meeting link for the lesson. |
| Teaching staff name | Name of the lesson’s teacher. |
| Teaching staff email | Email of the lesson’s teacher. |
Fields in a task:
| Field | Description |
|---|---|
| Task name | A short title for the task. |
| Deadline | Deadline of task in DD-MM-YYYY format. |
| Remarks | Additional information on the task. |
| Graded status | True or false, whether the task is graded. |
| Done status | True or false, whether the task is done. |
Additionally, you can store your lecture notes in GULIO using the cheat-sheet feature. Cheat-sheets are stored as text files and GULIO has a built-in text editor that can be used to edit them. Cheat-sheets are unformatted so that users can focus on writing the content.
Dashboard Commands
These are commands used on the dashboard layer, when no modules have been selected. Commands here deal with the creation of modules, as well as accessing modules.
Listing all dashboard commands : help
Use this command to view all commands accessible from the dashboard layer.
Format:
help
Exiting the program : exit
Use this command to exit GULIO.
Format:
exit
Opening a module : open
Use this command to open an existing module.
Format:
open <module code>
Example:
| Step #1 | GULIO >> open CS2113T |
Result - GULIO moves from dashboard to module layer, and the module CS2113T is loaded.
💡 Module name is auto-converted to uppercase, hence is not case-sensitive.
Adding a module : add
Use this command to add a new module with the specified name.
Format:
add <module code>
Example:
| Step #1 | GULIO >> add CS2113T |
Result - A new module called CS2113T is added.
💡 Module name is auto-converted to uppercase, hence is not case-sensitive.
Deleting a module : del
Use this command to delete existing modules.
Upon entering the command, GULIO will show the list of current modules. Then, specify the indices corresponding to the modules you would like to delete.
Format:
del
Example:
| Step #1 | GULIO >> del |
| Step #2 | 1 3 |
Result - Modules CS2107 and CS2101 are removed from the module list.
💡 Separate indices with a space. Invalid indices will be ignored.
Listing all modules : mods
Use this command to view all existing modules.
Format:
mods
Example:
| Step #1 | GULIO >> mods |
Module Commands
These are commands used on the module layer, when a module has been selected. Commands here deal with modifying the data corresponding to the specified module.
Listing all module commands : help
Use this command to view all commands accessible from the module layer.
Format:
help
Closing a module : close
Use this command to close the current module and go back to the dashboard layer.
Format:
close
Showing module information : info
Use this command to get a summary of the module, including lessons and undone tasks.
Format:
info
Example:
| Step #1 | CS2113T >> info |
Result - Prints overview of module, including lessons and undone tasks.
Adding a lesson : add lsn
Use this command to add a new lesson to the module.
Choose from one of the three lesson types: lecture,lab or tutorial. Follow one of the following formats to include additional information with the lesson.
Format:
add lsn <lesson type>
add lsn <lesson type> ;; <day & time>
add lsn <lesson type> ;; <day & time> ;; <link>
add lsn <lesson type> ;; <day & time> ;; <link> ;; <teaching staff name>
add lsn <lesson type> ;; <day & time> ;; <link> ;; <teaching staff name> ;; <email>
Example:
| Step #1 | CS2113T >> add lsn tutorial ;; Wednesday 9am - 10am ;; https://zoom.us/ |
Result - Adds “Tutorial” to the module’s list of lessons, with specified details.
⚠ Only accepts 3 lesson types:
Lecture,LabandTutorial. Lesson type is auto-capitalised when displayed, hence input for the field is not case-sensitive.
💡 To skip an input, leave a blank in between the field separators. For example,
add lsn tutorial ;; ;; ;; Prof Akshay ;; akshay@email.comwill add “Tutorial” to the module’s list of lessons with only the given teaching staff name and email. The fields “day & time” and “link” were skipped.
Note: “lesson type” cannot be skipped.
Deleting a lesson : del lsn
Use this command to delete lessons from the module.
Upon entering the command, GULIO will show the list of lessons in the module. Then, specify the indices corresponding to the lessons you would like to delete.
Format:
del lsn
Example:
| Step #1 | CS2113T >> del lsn |
| Step #2 | 1 2 |
Result - The lessons “Lecture” and “Tutorial” are removed from the list of lessons.
💡 Separate indices with a space. Invalid indices will be ignored.
Editing a lesson : edit lsn
Use this command to edit a lesson in the module.
Upon entering the command, GULIO will show the list of lessons in the module. Select the lesson you would like to edit by entering its index. Then, you will see a list of fields you can edit. Specify the indices of the fields you would like to edit. Finally, for each field you have selected, enter a new value.
Format:
edit lsn
Example:
| Step #1 | CS2113T >> edit lsn |
| Step #2 | 1 |
| Step #3 | 1 |
| Step #4 | Thursday 9am |
Result - Edits time and day of “Lecture”.
💡 While only one lesson can be edited at a time, you can edit multiple fields simultaneously. As such, separate multiple indices with a space. Invalid indices will be ignored.
Opening lesson link : link
Use this command to open your lesson links.
Upon entering the command, GULIO will show the list of lessons in the module. Then, specify the indices corresponding to the lessons whose links you would like to open.
Format:
link
Example:
| Step #1 | CS2113T >> link |
| Step #2 | 1 |
Result - Opens the Zoom link used for lectures in a browser.
💡 Multiple links can be opened at once. As such, separate indices with a space. Invalid indices will be ignored.
⚠ Web protocol must be included in lesson link for security purposes. Links without protocol (e.g. no https nor http at the start) will be deemed invalid.
Listing all teaching staff : tch
Use this command to view all teaching staff in the module.
Format:
tch
Example:
| Step #1 | CS2113T >> tch |
Listing all lessons : lsn
Use this command to view all lessons in the module.
Format:
lsn
Example:
| Step #1 | CS2113T >> lsn |
Adding a task : add task
Use this command to add a new task to the module.
Follow one of the two formats below.
Format:
add task <task name> ;; <deadline>
add task <task name> ;; <deadline> ;; <remarks>
Example:
| Step #1 | CS2113T >> add task iP submission ;; 3-3-2021 ;; Attach JAR |
| Step #2 | Y |
Result - Adds “iP submission” to the module’s list of tasks, with the specified details.
💡 Deadline has to be in the DD-MM-YYYY format.
Note: a task should minimally have a “task name” and “deadline”, so only the “remarks” field can be skipped.
💡 When asked if the task is graded, both “y” and “Y” will work. Response is not case-sensitive for the user’s convenience.
Deleting a task : del task
Use this command to delete tasks from the module.
Upon entering the command, GULIO will show the list of tasks in the module. Then, specify the indices corresponding to the tasks you would like to delete.
Format:
del task
Example:
| Step #1 | CS2113T >> del task |
| Step #2 | 1 3 |
Result - The tasks “weekly exercise” and “iP submission” are removed from the list of tasks.
💡 Separate indices with a space. Invalid indices will be ignored.
Editing a task : edit task
Use this command to edit a task in the module.
Upon entering the command, GULIO will show the list of tasks in the module. Select the task you would like to edit by entering its index. Then, you will see a list of fields you can edit. Specify the indices of the fields you would like to edit. Finally, for each field you have selected, enter a new value.
Format:
edit task
Example:
| Step #1 | CS2113T >> edit task |
| Step #2 | 2 |
| Step #3 | 2 |
| Step #4 | 2-3-2021 |
Result - Edits the deadline for the task “lecture quiz”.
💡 While only one task can be edited at a time, you can edit multiple fields simultaneously. As such, separate multiple indices with a space. Invalid indices will be ignored.
Marking task as done : mark
Use this command to mark tasks as done.
Upon entering the command, GULIO will show the list of tasks in the module that are undone. Then, specify the indices corresponding to the tasks you would like to mark as done.
Format:
mark
Example:
| Step #1 | CS2113T >> mark |
| Step #2 | 1 2 |
Result - The tasks “weekly exercise” and “lecture quiz” are marked as done.
💡 Separate indices with a space. Invalid indices will be ignored.
Marking task as undone : unmark
Use this command to mark tasks as undone.
Upon entering the command, GULIO will show the list of tasks in the module that are done. Then, specify the indices corresponding to the tasks you would like to mark as undone.
Format:
unmark
Example:
| Step #1 | CS2113T >> unmark |
| Step #2 | 1 |
Result - The task “watch video snippets” is marked as undone.
💡 Separate indices with a space. Invalid indices will be ignored.
Listing all tasks : task
Use this command to view all the tasks in the module.
Done and undone tasks are separated. Undone tasks are sorted by earliest deadline.
Format:
task
Example:
| Step #1 | CS2113T >> task |
Adding a cheat-sheet : add cs
Use this command to add a new cheat-sheet to the module and open it in the text editor.
Format:
add cs <cheat-sheet name>
Example:
| Step #1 | CS2113T >> add cs lecture notes |
Result - Adds new cheat-sheet “lecture notes” and opens it in the text editor.
⚠ Please do not include any file extension in the cheat-sheet name.
Deleting a cheat-sheet : del cs
Use this command to delete the specified cheat-sheet from the module.
Format:
del cs <cheat-sheet name>
Example:
| Step #1 | CS2113T >> del cs lecture notes |
Result - Deletes cheat-sheet “lecture notes”.
⚠ Please do not include any file extension in the cheat-sheet name.
Editing a cheat-sheet : edit cs
Use this command to open and edit the specified cheat-sheet in the text editor.
Format:
edit cs <cheat-sheet name>
Example:
| Step #1 | CS2113T >> edit cs lecture notes |
Result - Opens cheat-sheet “lecture notes” in text editor.
⚠ Please do not include any file extension in the cheat-sheet name.
Listing all cheat-sheets : cs
Use this command to view the list of cheat-sheets you have for the module.
Format:
cs
Example:
| Step #1 | CS2113T >> cs |
Data & Storage
Automatic Saving
Data for each module is stored in their respective module’s text file, located in a folder called Data created in the same directory as the GULIO.jar file. When moving this folder, please ensure that it is placed in the same directory as your GULIO.jar file. After every modification, changes are automatically saved to the file.
Manual Editing Outside of GULIO
Files can be modified outside of the program. Invalid inputs will not be loaded when the program is run and will be removed from the file. To ensure that your data loads properly, please follow the format stated in the data files strictly.
Format for Lessons:
lesson | <type> | <Day & Time>lesson | <type> | <Day & Time> | <Link>lesson | <type> | <Day & Time> | <Link> | <Teaching Staff Name>lesson | <type> | <Day & Time> | <Link> | <Teaching Staff Name> | <Teaching Staff Email>
⚠ Only accepts 3 lesson types: “Lecture”, “Lab” and “Tutorial”.
Format for Tasks:
task | <description> | <deadline> | <is done> | <is graded>task | <description> | <deadline> | <is done> | <is graded> | <remarks>
⚠ For
<is done>and<is graded>, use ‘T’ for true and ‘F’ for false.
Text Editor
GULIO comes with a built-in text-editor that allows you to edit cheat sheets directly. This text editor can be accessed via the add and edit cheat sheet commands. Cheat-sheets are stored in the Cheatsheet directory within their respective module directories as .txt files.
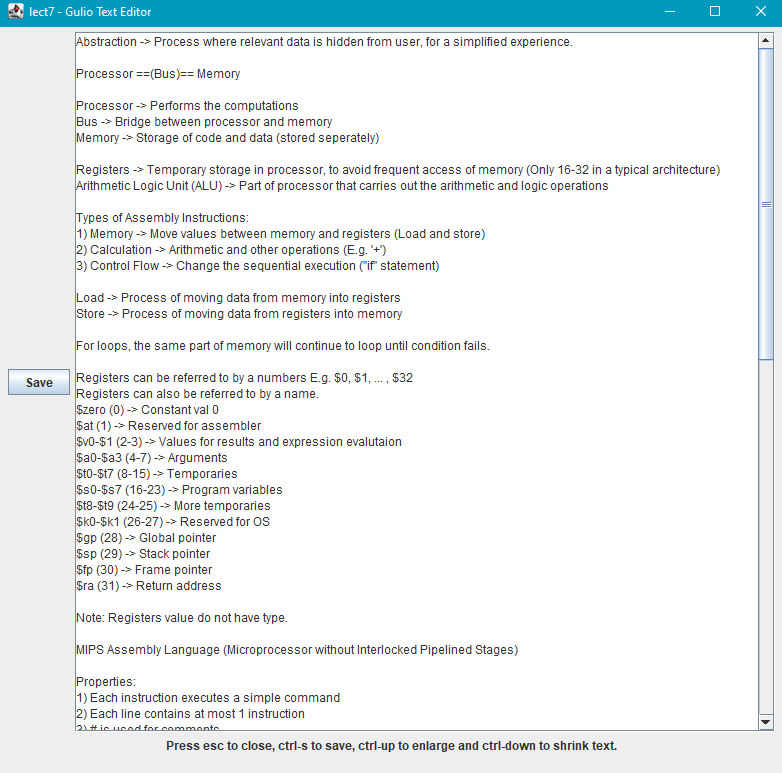
Figure 4 - GULIO Text Editor
In the text editor, you can type in your notes in the text field. When done, remember to save any changes via the ctrl-s shortcut. To close the text editor, simply press the escape key on your keyboard. Using ctrl-up and ctrl-down, you can enlarge or shrink text respectively.
| Shortcuts | Actions |
|---|---|
ctrl-s |
Save cheat-sheet. |
ctrl-up |
Enlarge text. |
ctrl-down |
Shrink text. |
esc |
Exit test editor |
⚠ Do not include file extension (e.g. ”.txt”) when creating or editing the cheat-sheet.
FAQ
Here are some frequently asked questions that you may have regarding GULIO.
Q: How do I open GULIO?
A: Please refer to the steps here.
Q: Why am I unable to open cheat-sheet in Windows Subsystem for Linux (WSL)?
A: GULIO’s cheat-sheet feature requires the usage of GUI, which is not available on WSL.
Q: Where can I find the data files for GULIO?
A: Data used by GULIO are stored in the Data directory, which is created in the same location that the GULIO.jar file is in.
Q: Where can I submit any feedback or issues regarding GULIO?
A: You can create an issue here. Thank you very much.
Command Summary
Dashboard Commands Summary
| Keyword | Format |
|---|---|
| help | help |
| exit | exit |
| open | open <module code> |
| add | add <module code> |
| delete | del |
| modules | mods |
Module Commands Summary
| Keyword | Format |
|---|---|
| help | help |
| close | close |
| info | info |
| add lesson | add lsn <lesson type> ;; <day & time> ;; <link> ;; <teaching staff name> ;; <email> |
| delete lesson | del lsn |
| edit lesson | edit lsn |
| link | link |
| teacher | tch |
| lessons | lsn |
| add task | add task <task name> ;; <deadline> ;; <remarks> |
| delete task | del task |
| edit task | edit task |
| mark | mark |
| unmark | unmark |
| tasks | task |
| add cheat-sheet | add cs <cheat-sheet name> |
| delete cheat-sheet | del cs <cheat-sheet name> |
| edit cheat-sheet | edit cs <cheat-sheet name> |
| cheat-sheets | cs |